Create Sublayers
Overview
Sublayers allow you to group and visualize a filtered subset of data from an existing layer. This helps you focus on specific elements such as transformers, switches, or critical devices within a larger dataset.
Prerequisites
- ADMS must be enabled for the project
- Network data must be uploaded
- You must have access to the ADMS module
How to Create a Sublayer
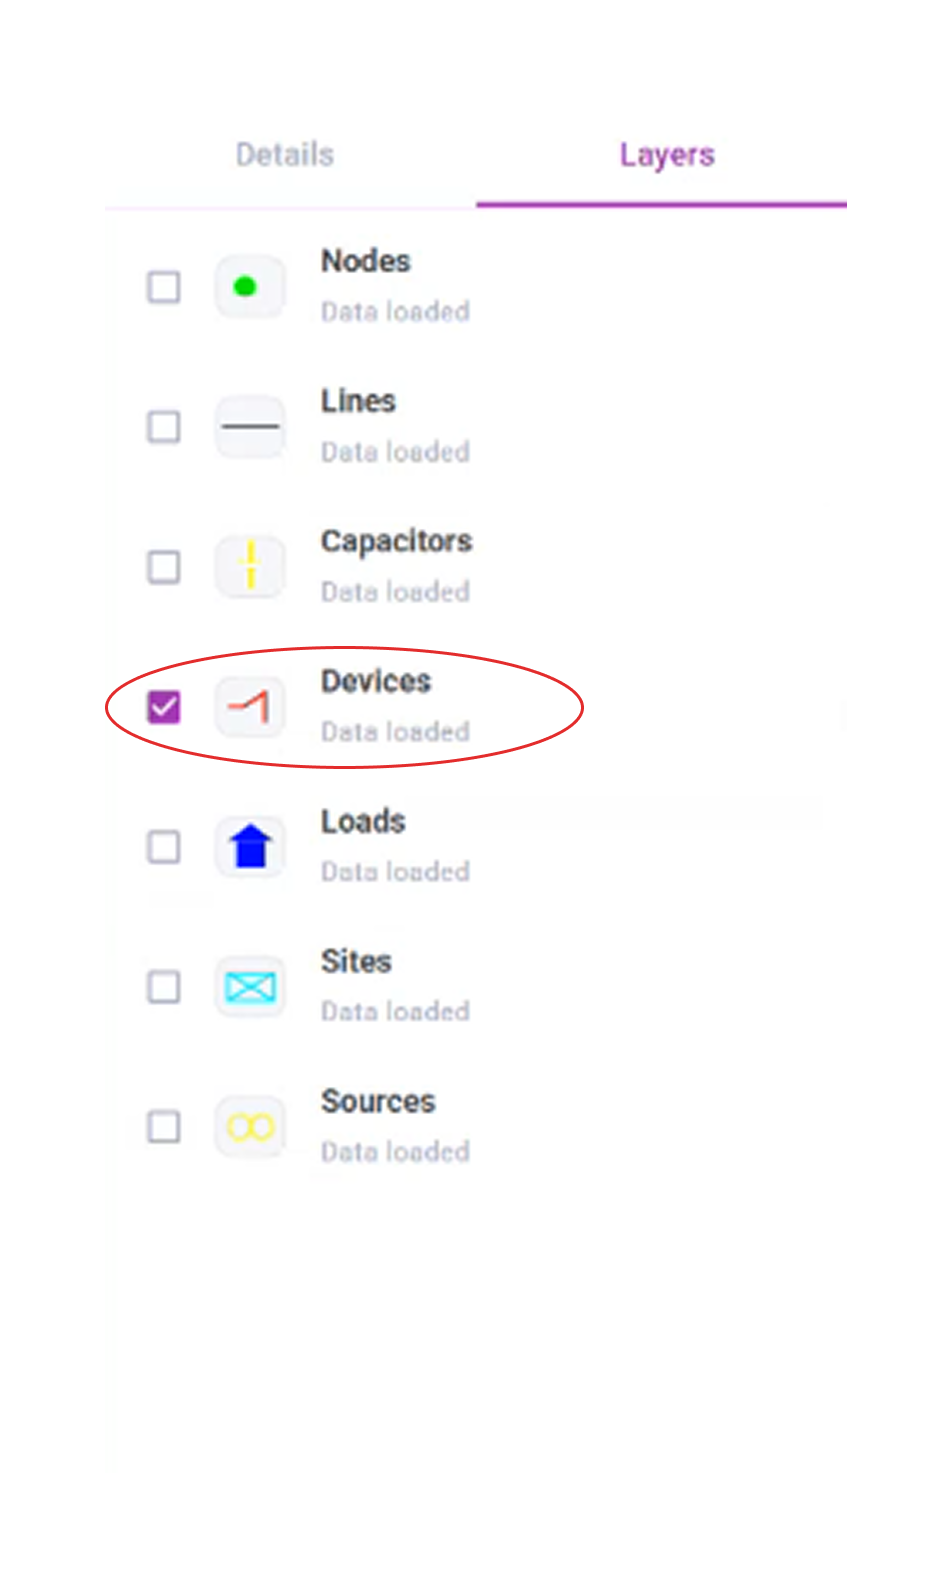
Step 1: Select the layer icon
- Click the Layers icon from the right panel
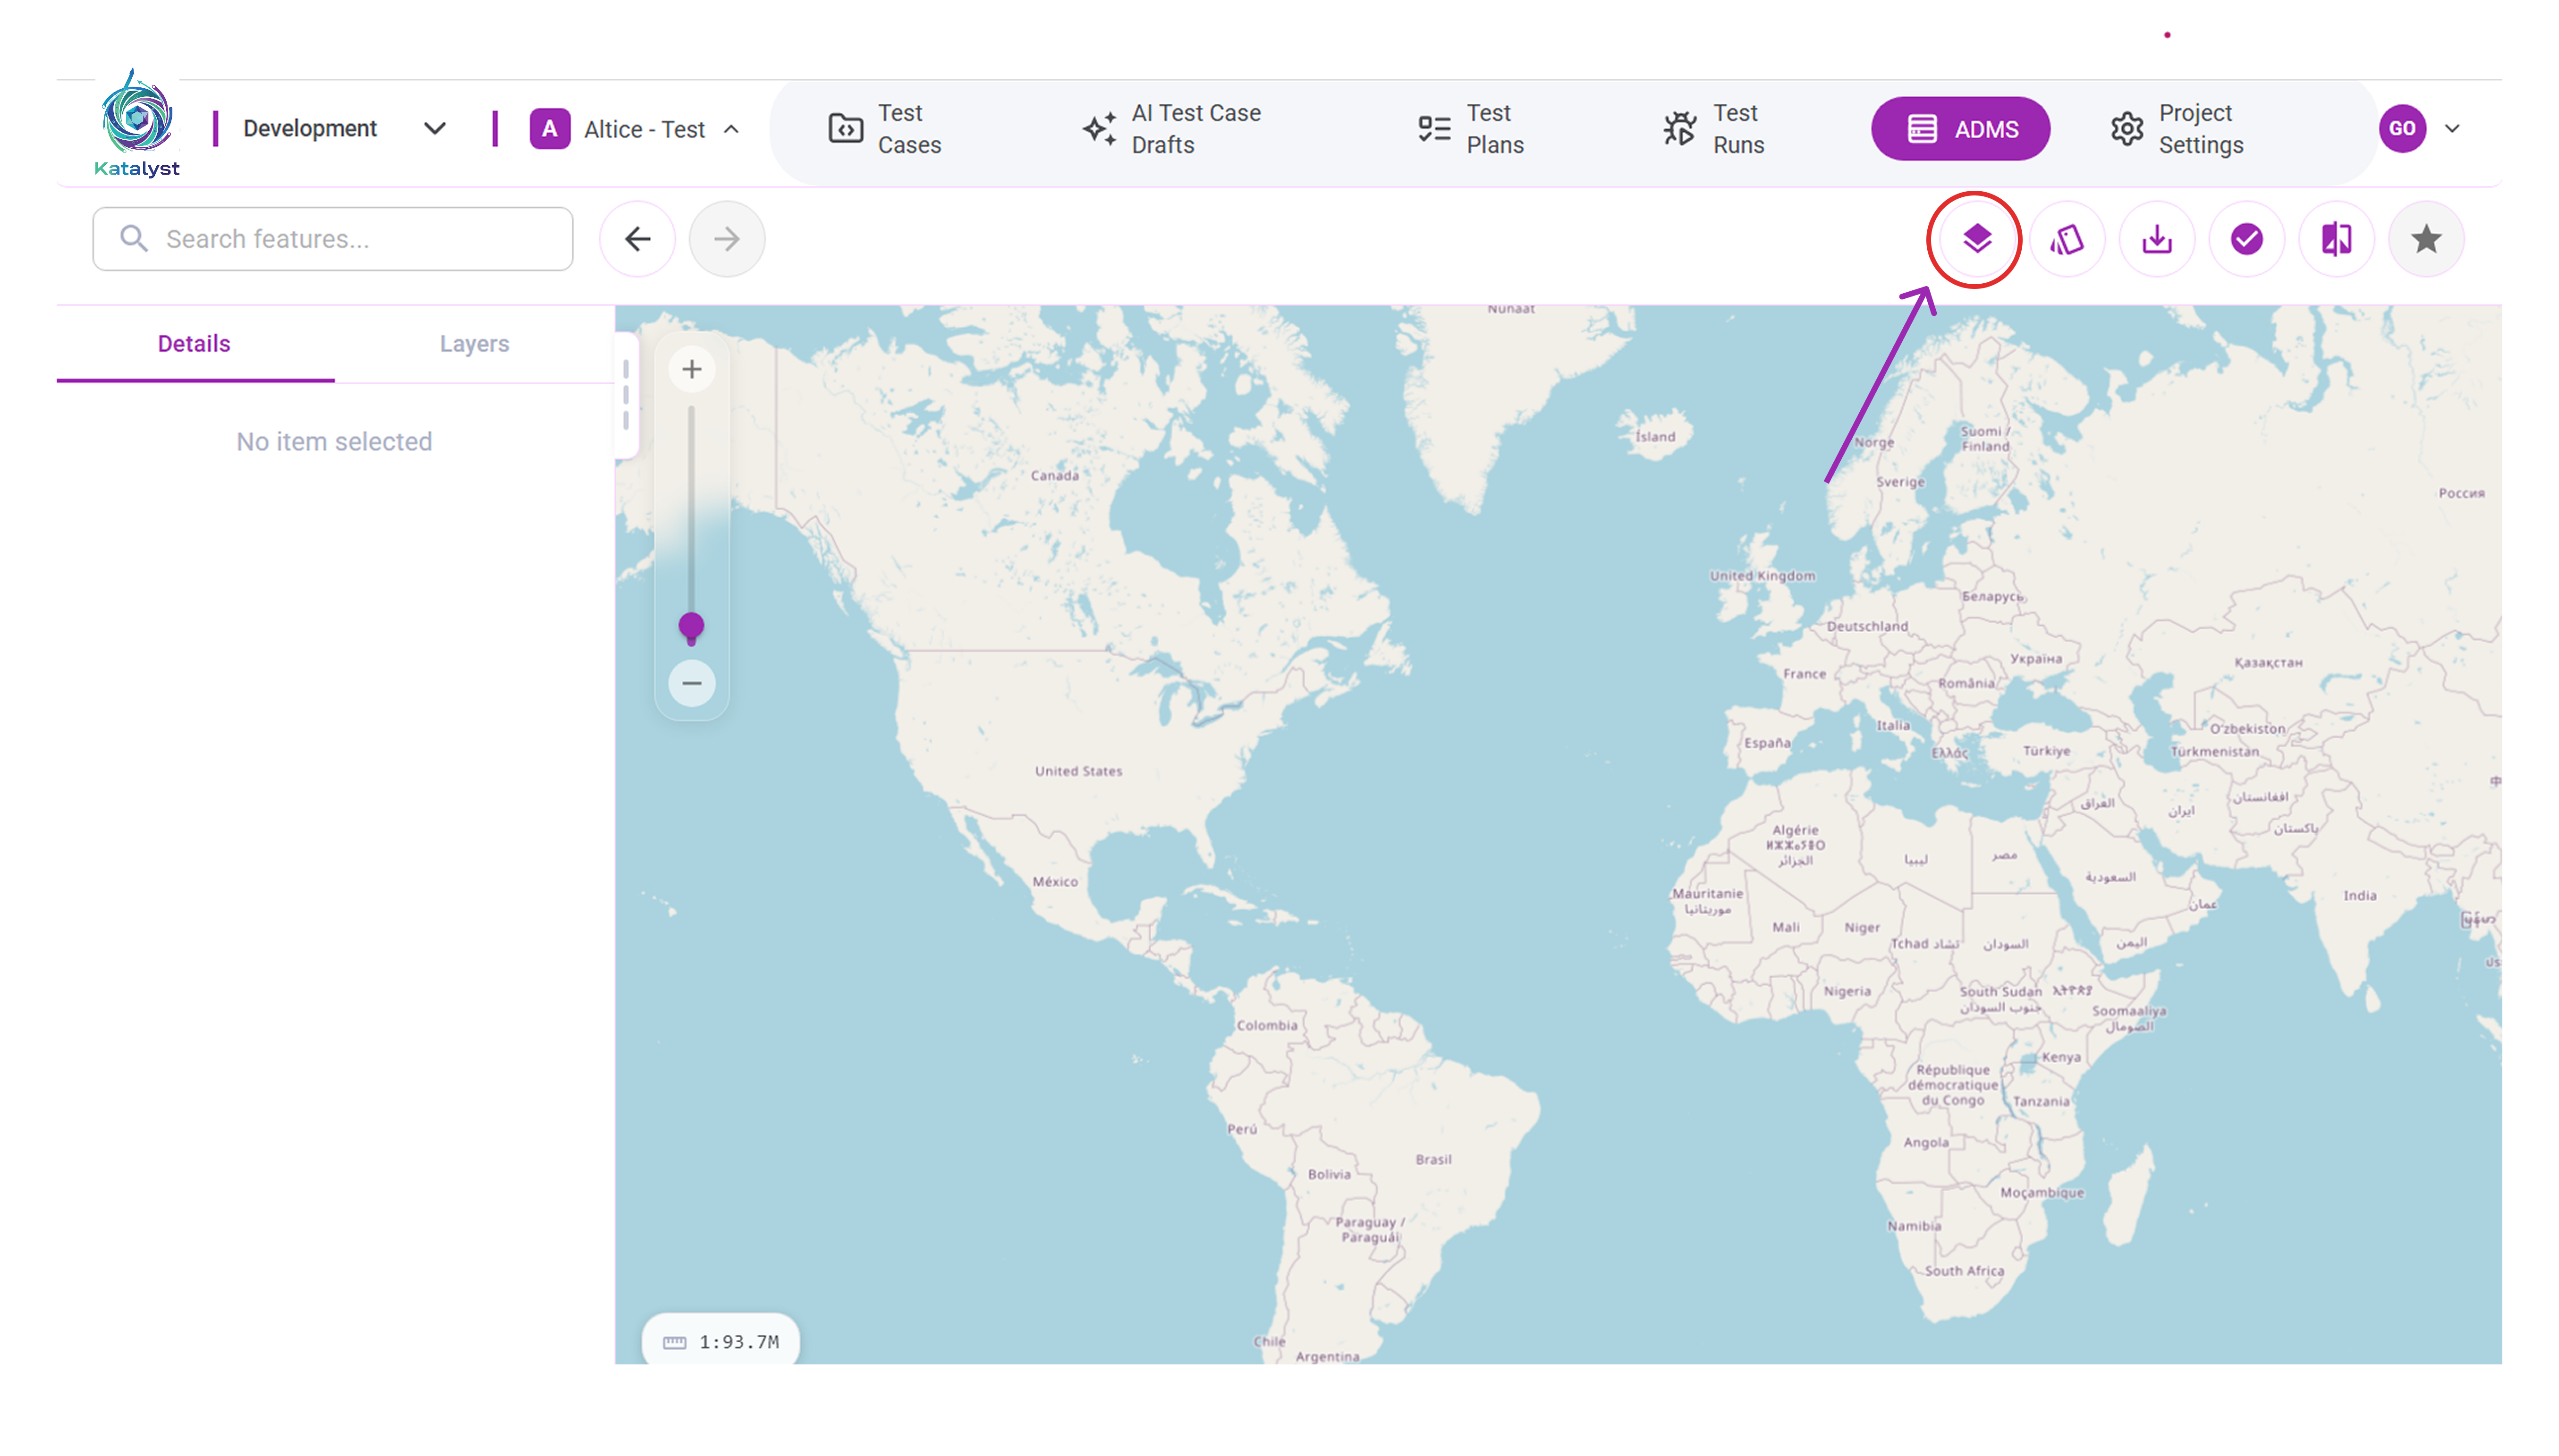
- Select the layer for which you want to create a sublayer
(for example: Devices).
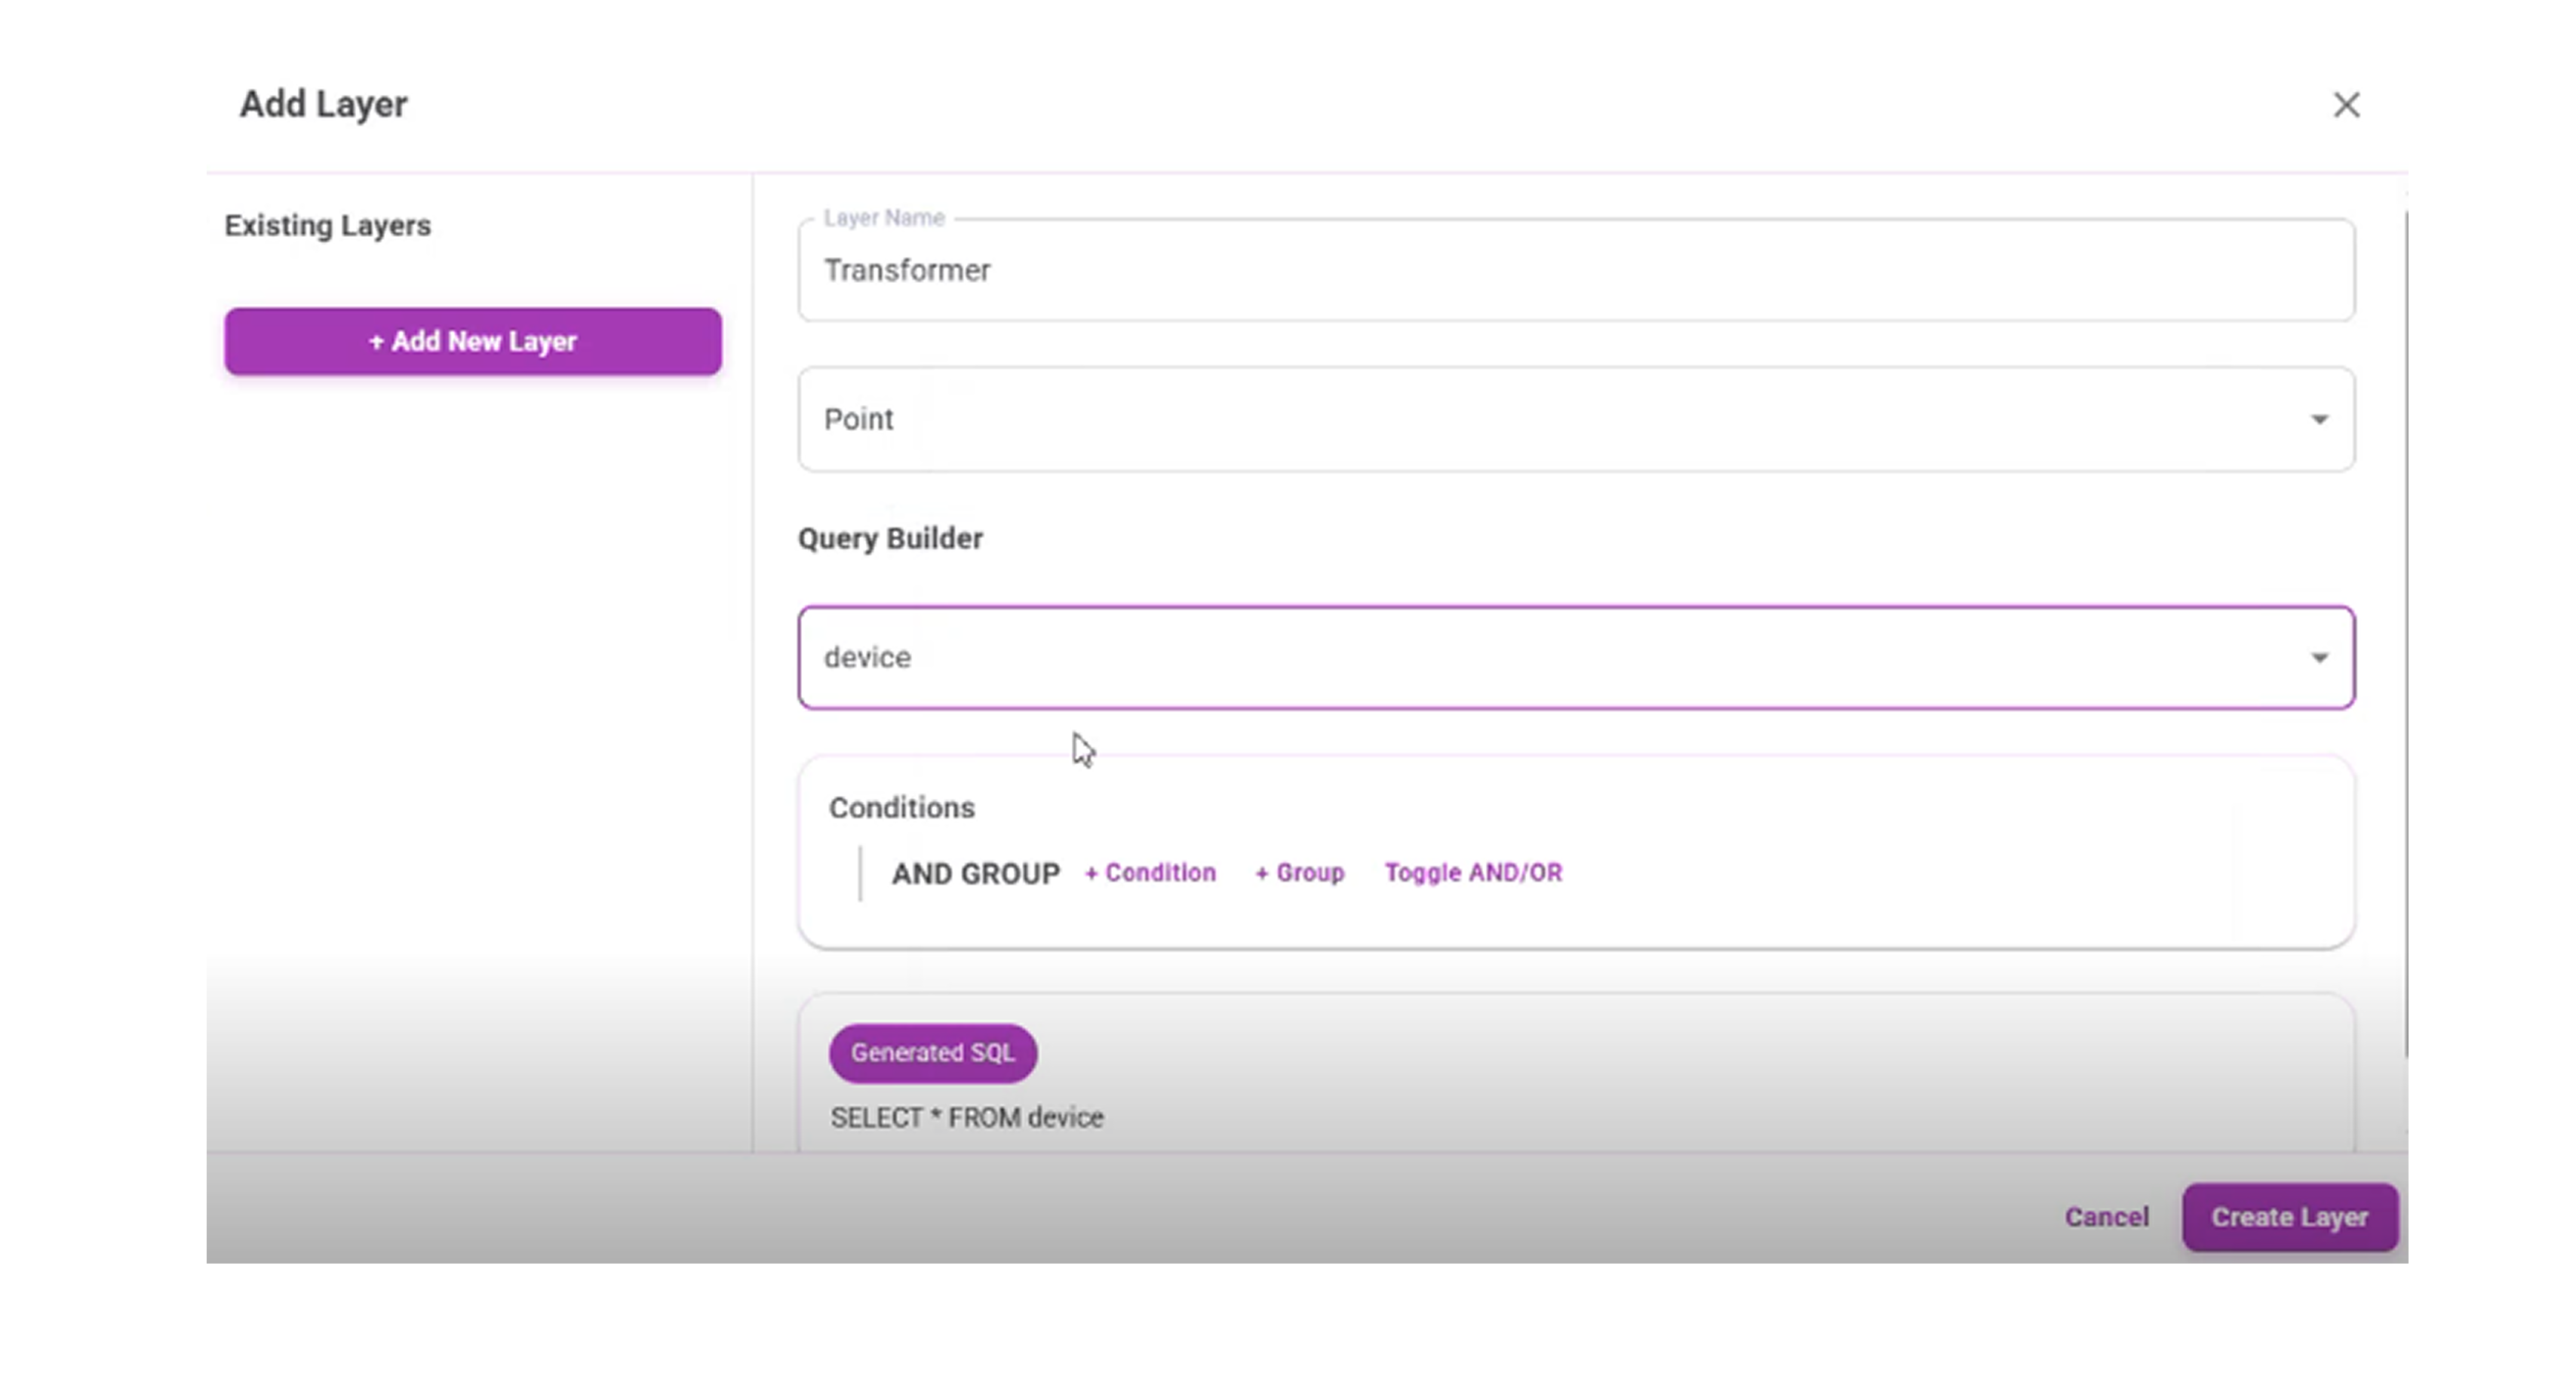
Step 2: Define the Sublayer
In the Add Layer window, enter the following details:
Layer Name
Enter a name for the sublayer (for example: Transformer)Geometry Type
Select the geometry type.
(For Devices, choose Point)Query Builder
Select the dataset (for example: device)Conditions
Add filter rules to define which elements should be included
(for example: only transformers or active devices)
Click Create Layer
Step 3: View the Sublayer
- After the sublayer is created, it appears under the selected parent layer in the Layers panel (for example: Devices → Transformer)
- Select the sublayer to display only the filtered elements on the map
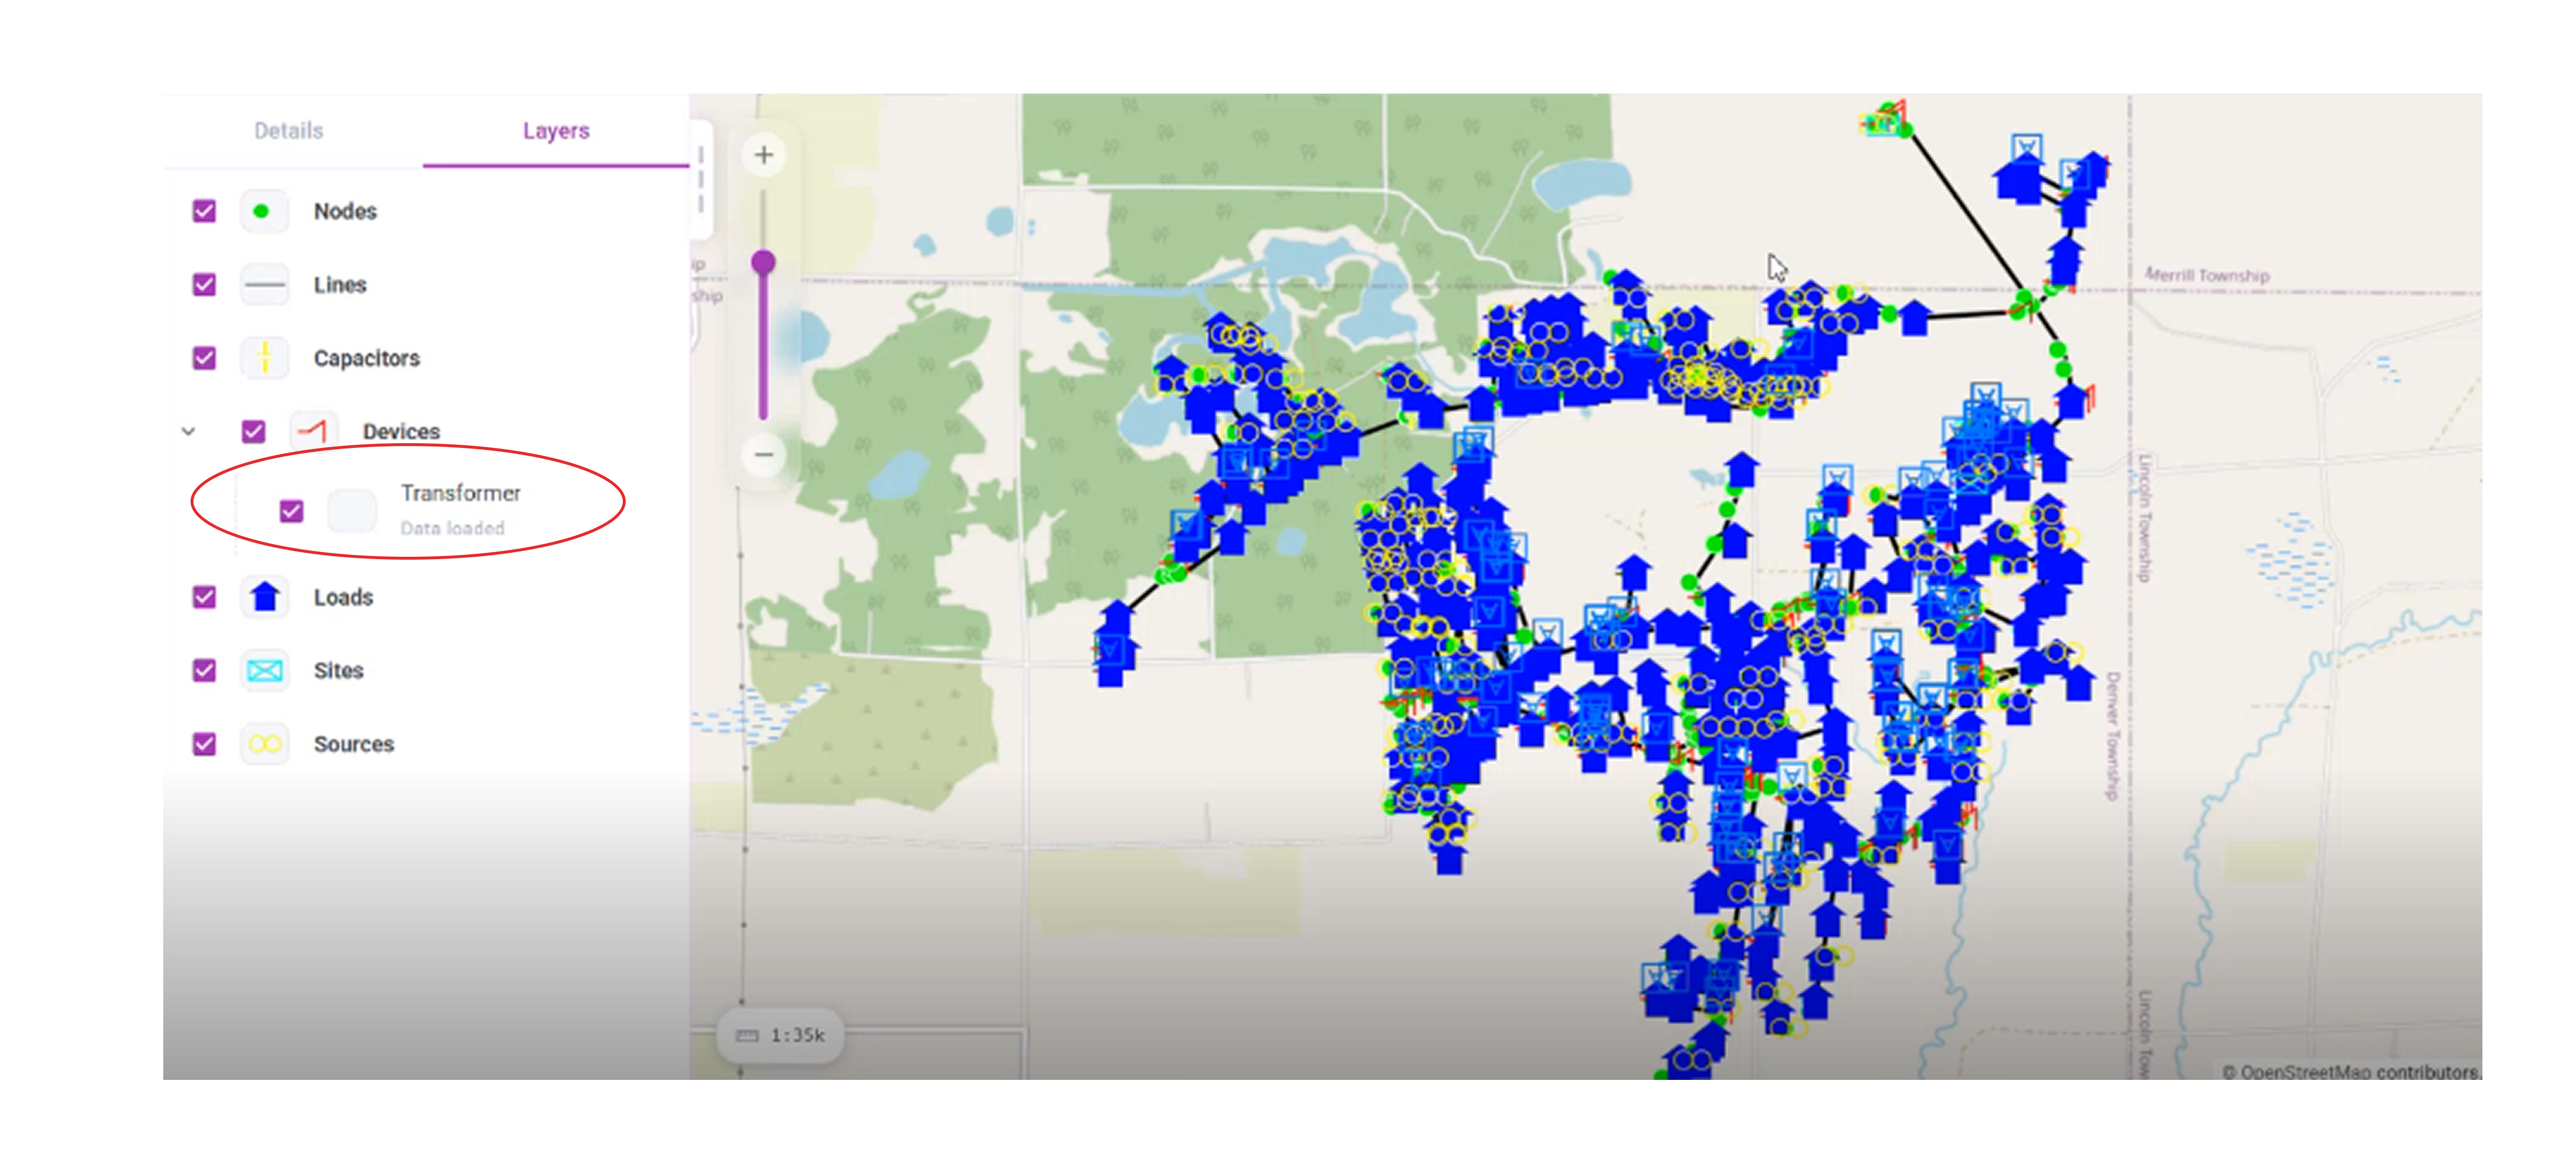
Result
- A new sublayer is created under the selected parent layer
- Only the elements matching the defined conditions are shown on the map
Notes
- Sublayers do not modify the original dataset
- You can create multiple sublayers under the same parent layer
- Filters can be edited later to refine the results